Inclusion Rules
With Inclusion Rules, Administrators and Designers can dynamically show or hide pages, sections and content in a document.
Example:
Let's say your document contained a section that was targeted to residents of New York state only. If the recipient of the document did not live in New York state, the section should not be included in the final document.
You can add an expression to only include or remove the section based on the recipient's state using the Inclusion Rule's expression builder. RecipientContact.State == "New York"
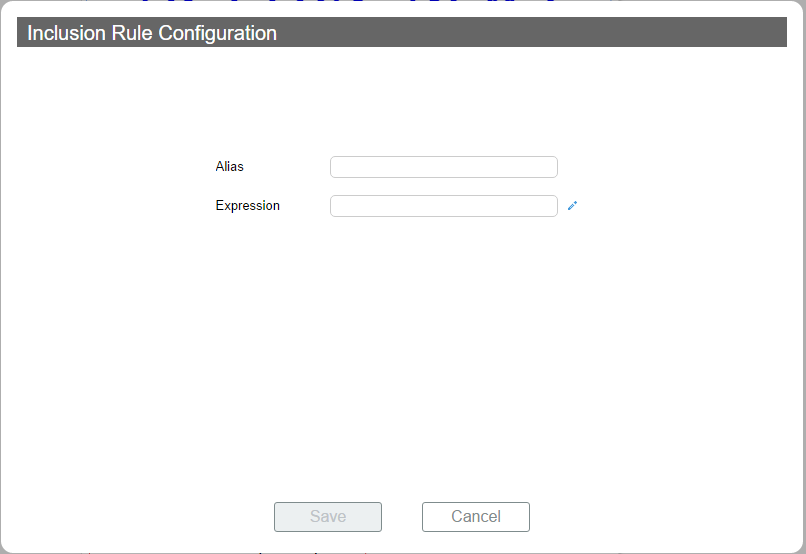
Inclusion Rule Configuration
Administrators and Designers can add multiple inclusion rules in ContentWelder Designer.
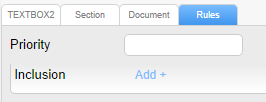
Click on the Rules tab to access the Inclusion Rules option and then set the Priority value. This will determine when the inclusion rule is processed.

To add an inclusion rule, click the Add+ button to load the Inclusion Rule Configuration option.

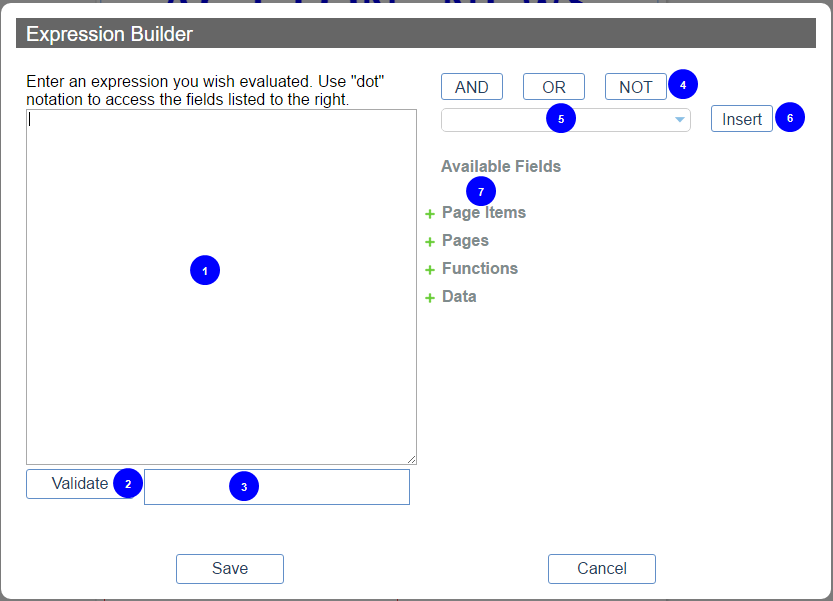
Input a name for the inclusion rule into the Alias field and click the pencil icon to load the expression builder. This is where you will configure the criteria for the inclusion rule.

| # | Name | Description |
| 1 | Expression Box |
Use this text box to create a new expression or edit an existing expression. You can type the required syntax for the expression, and use the lists and buttons in the dialog box to enter required information. When you use the controls on the dialog box, the information is added at the current cursor position in the Expression text box. |
| 2 | Validation Button |
Click this button to verify the syntax of the statement in the Expression text box. Clicking Verify saves time by allowing you to check the validity of an expression without leaving the Expression Builder. |
| 3 | Validation Results |
If the validation results box is highlighted green, the condition is valid, if it is highlighted red, there is an error in the condition. Note the condition results below:
|
| 4 | Operator Buttons | Click the buttons in this area to add operators to the expression box. |
| 5 | Equality Operators |
The following operators options are available:
|
| 6 | Insert Button | Insert the appropriate equality operator as shown in #5. |
| 7 | Available Fields |
Lists all of the data fields and computed fields in the selected table. Double-click a field entry to add it to the Expression text box. The following options are currently available:
|
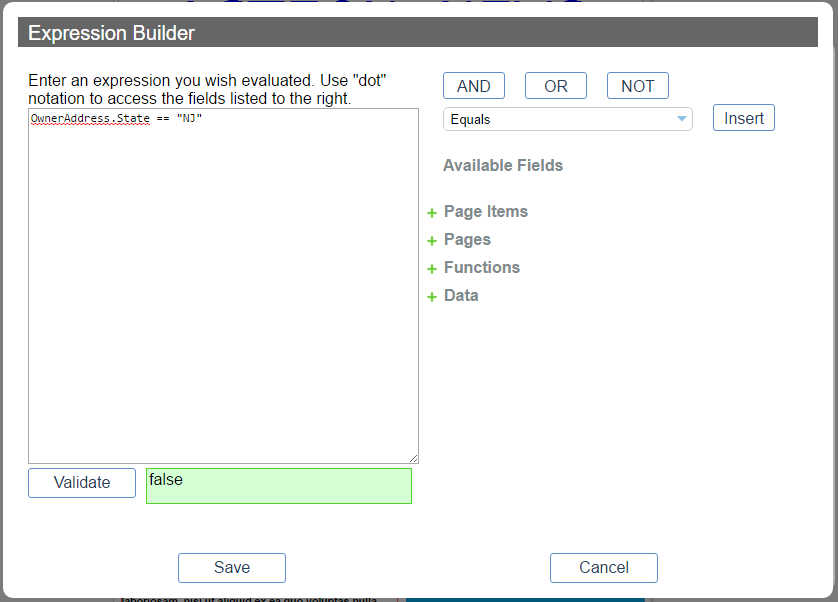
An example of an valid expression where the text box will only be shown if the recipient of the document state is New York is shown in the screenshot below.

